
So, we finally got around to buying some chicks after looking at the city ordinance and realizing we do meet the requirements to have chickens in our backyard. The max we can have is six, so we bought six. We also knew we would need a chicken run to contain them when we could not be outside.
Our girls are currently in the brooder and will be for at least two more weeks. When we got them 3 weeks ago, we also bought a chicken coop with an attached run from Tractor Supply. It says it is good for up to six chickens….I have determined that is a lie.
Anyway, our girls definitely needed a bigger chicken run for the times that we would not be able to let them out to roam the backyard. So, I set off searching for one I could buy since my husband and I are NOT carpenters. In fact, we named our homestead Oddball Ranch due to the fact that everything we build is crooked (mostly because we eyeball everything) or just plain odd. But, even with squares and levels and all that jazz, crap still ends up crooked.
So after a lot of searching, and realizing that we had no intention of spending a small fortune to have a prefab chicken run, I set off to research how to build a chicken run ourselves.
I eventually came up with the following chicken run after watching several YouTube videos and it turned out great. I took a video along the way for those of my readers that prefer that route (the video is at the end of this post). We learned a couple of things along the way that we would change if we did it again (UPDATE, we have added onto the run to make it longer) and I will leave those notes below.
Supplies / Materials Used
* I am not including the materials we used to level the chicken run. The materials listed below are what we used for the run itself.
(9) Pre-treated 2×4’s (8 feet long)
(3) 36″x50 feet Chicken Wire Rolls (we ended up putting hardware cloth over this after more research, if done again we would forgo the chicken wire and just use hardware cloth. we used 1 roll of 48″x 50ft 1/2″ and 2 rolls of 24″ x 25 foot 1/2″ of hardware cloth if you want to go that route).
(2) 16ft feedlot panels
(2) 1x4x8 (to make a door)
Box of 4″ Decking Screws
Box of 1″ Wood Screws
Box of 2 1/2″ Wood Screws
Gate Latch
(3) Hinges
Staple Gun
Box of heavy-duty staples
Drill
Zip ties (small and large)
6ft x 25ft Shade Cloth (if doing this again I would get a bigger shade cloth such as this one, so I wouldn’t have multiple pieces to put up).
12″ Bungee Cords with Large Hooks
Carpenters Square
Pencil
Before You Begin
Before you begin putting this chicken run together, I just want to point out a couple of things we changed along the way that is not seen in the video as we build it. I’d suggest watching the video all the way through to the end where we go over things we would change before starting your own.
Chicken Wire – We ended up using hardware cloth over the chicken wire because we didn’t feel like taking the chicken wire off. If we were doing this again, we would omit the chicken wire and instead use hardware cloth for extra protection against predators.
Shade Cloth – Originally I bought the 6ft x 15ft shade cloth. I ended up only using 12ft to go over the top, so the bottom would be left open for airflow. I cut off the access and used the access to cover the 2ft that was not covered. If I had to do it over again I would buy a tarp to use instead this did not protect them against rain.
Directions
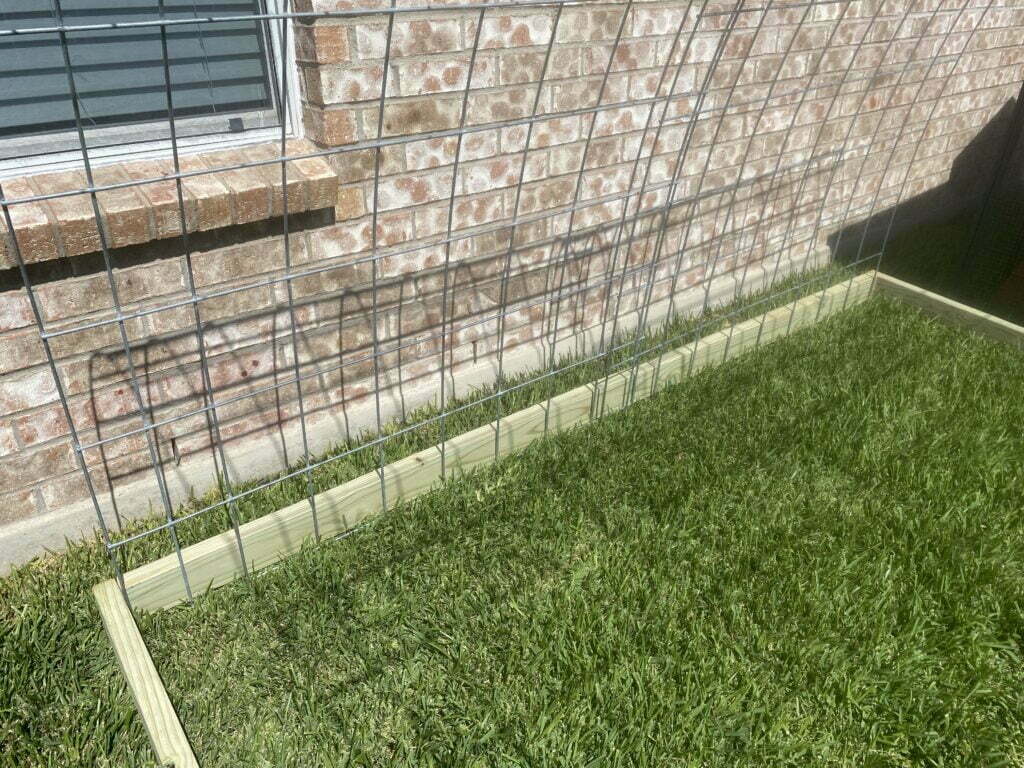
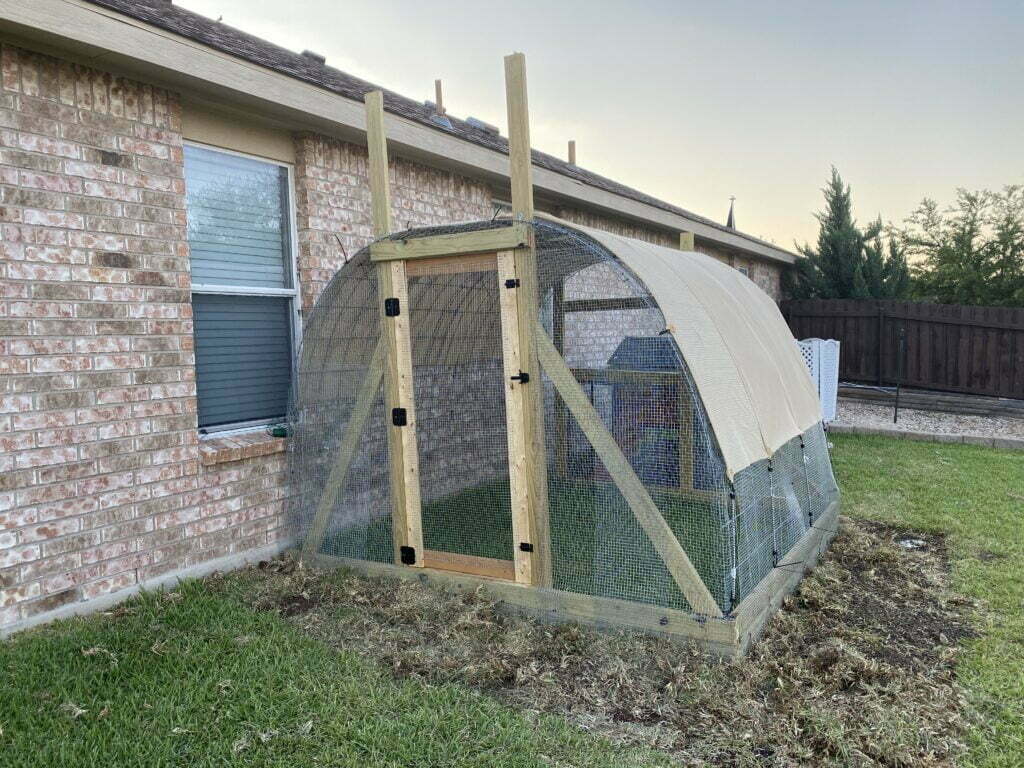
Step 1: Build the Bottom Frame
You will want to build the frame where the short sides of the 2×4 are facing up/down. Use a carpenter square to square the frame and the 4″ deck screws to secure the boards together.


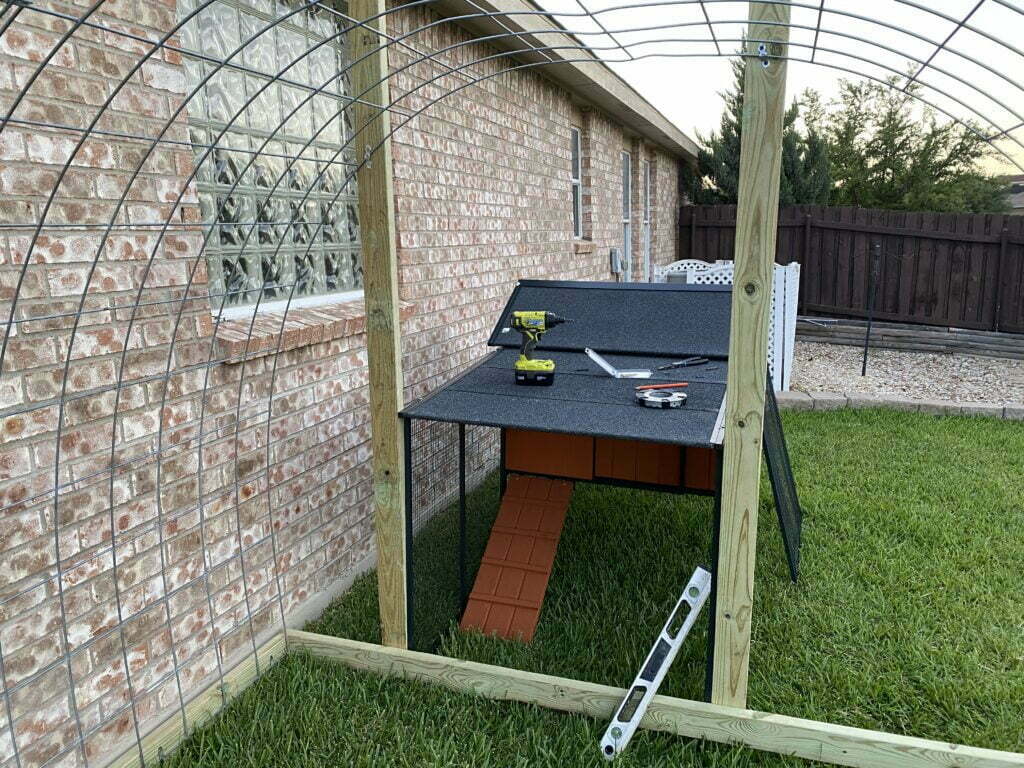
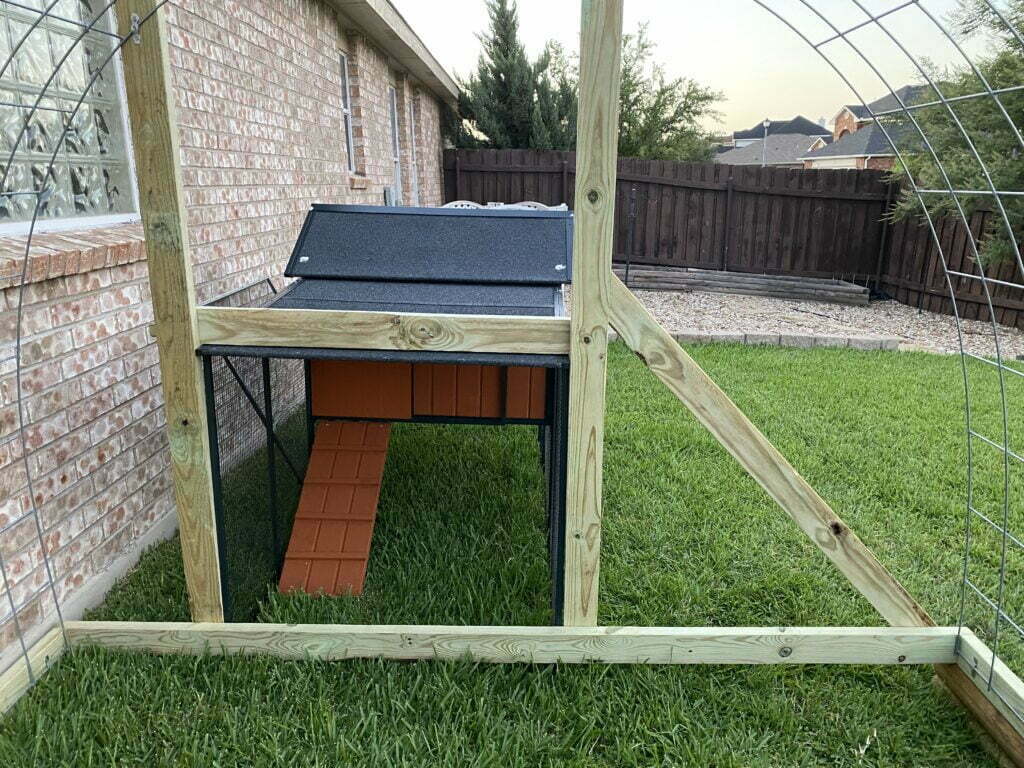
Step 2: Insert the Feed Lot Panels
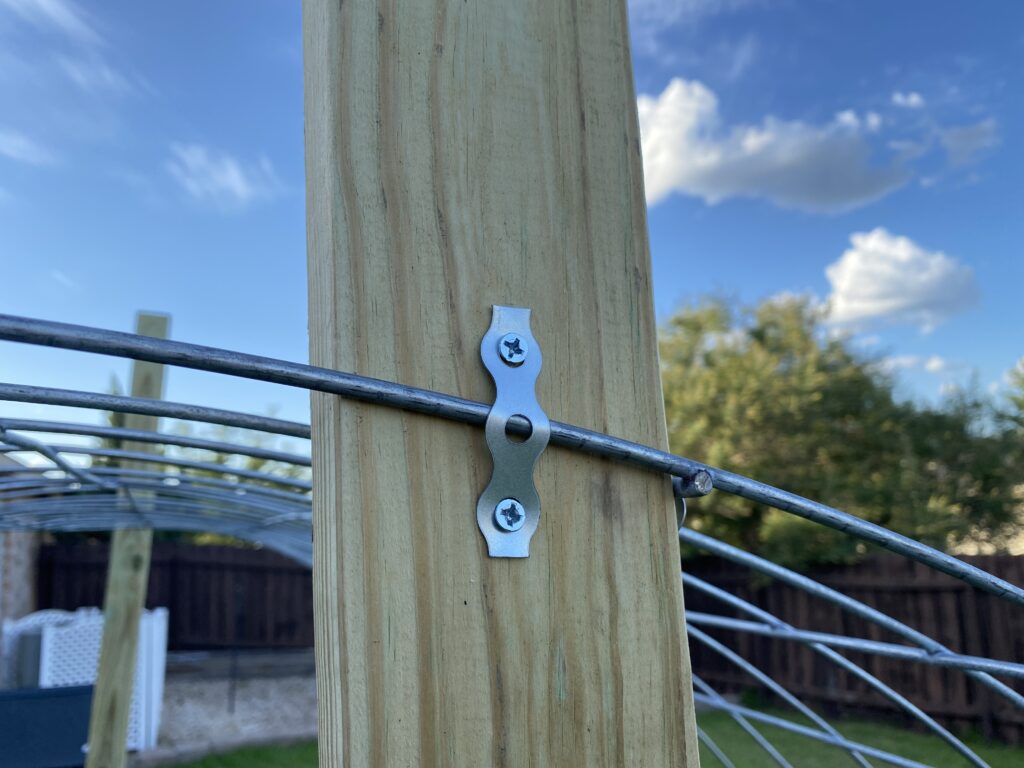
This will require two people. You will place one end of the feedlot panel next to the inside of the frame while someone else walks the other end to create a bend and place that end inside the opposite end of the frame. Once the arch has been created, use hanger strap and 1″ screws to secure it to the frame.


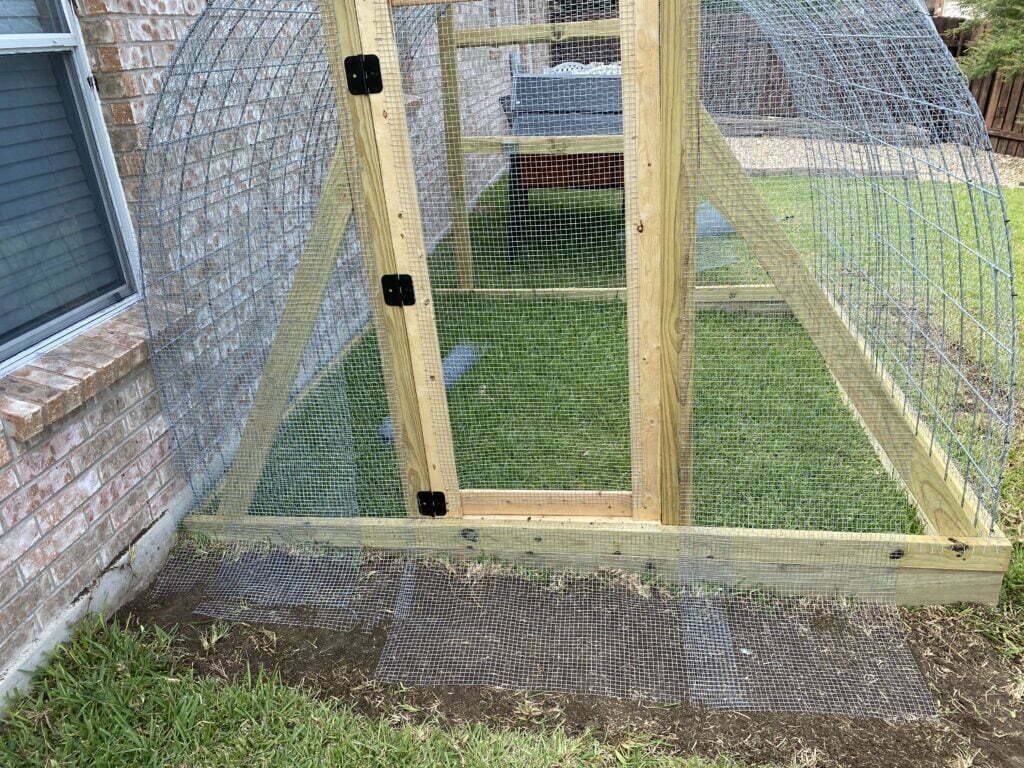
Step 3: Build a Door Frame
To build the door frame, you will need three 2x4x8 boards. First, decide how wide you want the door. To secure the boards, place the top of the board inside one of the holes in the feedlot panel and secure it with hanger strap and 1″ screws. Place the bottom of the board on the inside of the frame, level, and secure it with 2 1/2″ screws. Repeat on the other side. Place a header horizontal at the top (this will be the height of the door). Secure with 2 1/2″ screws.
Note: We chose not to cut off the top as we plan to hang a sign there.
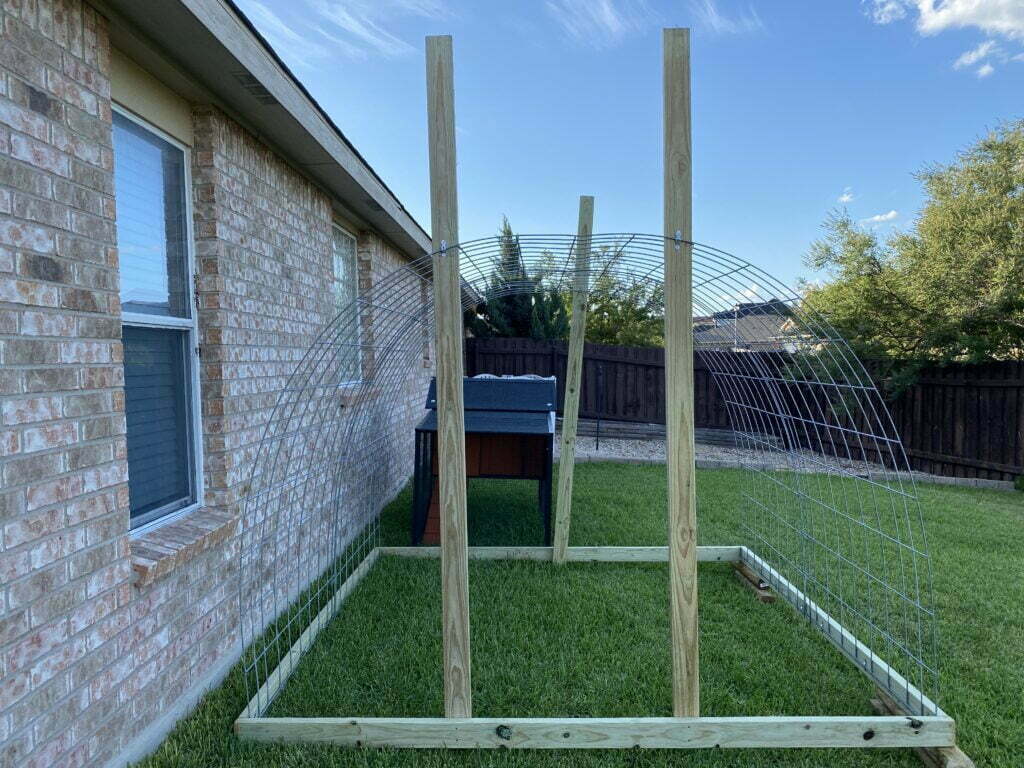
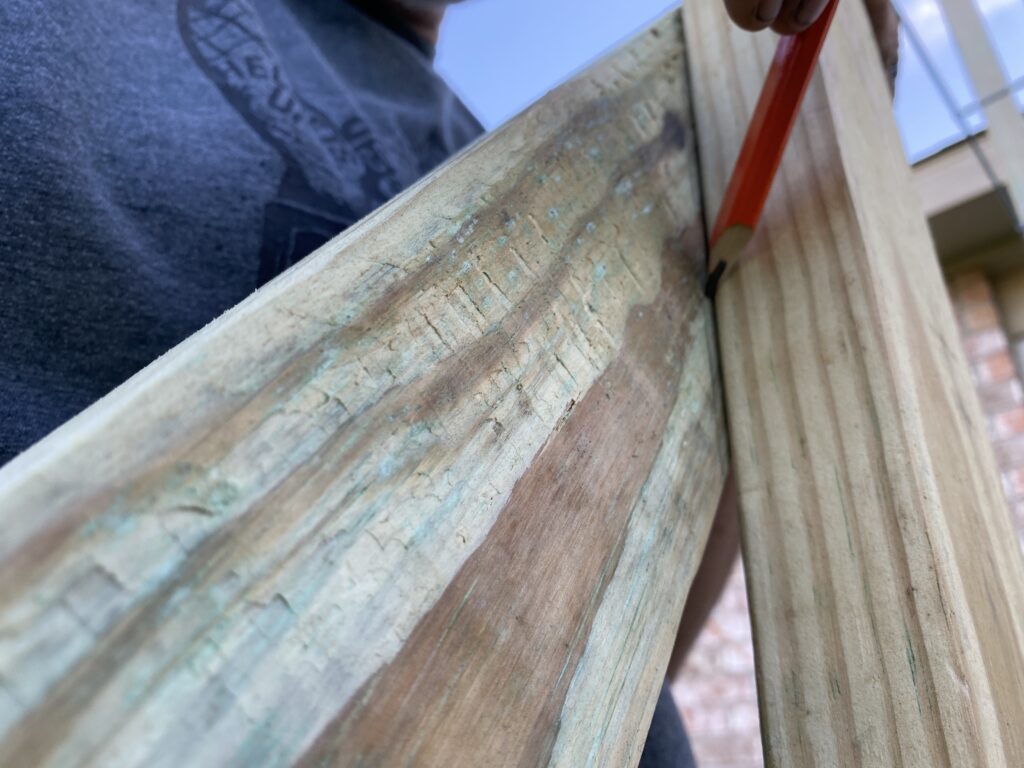
Once the frame has been built, put a brace on each side. To get the angle of the brace, place the bottom of the board inside the frame and the upper portion of the board on the outer side of the door frame and trace where it meets, and then cut (see video for better explanation). Place cut braces against the door frame and secure with 4″ screws at the top angle and 2 1/2″ screws at the bottom.


Once the braces were in, we screwed in the header for the door frame. This really should have been done before we did the braces, but oh well!

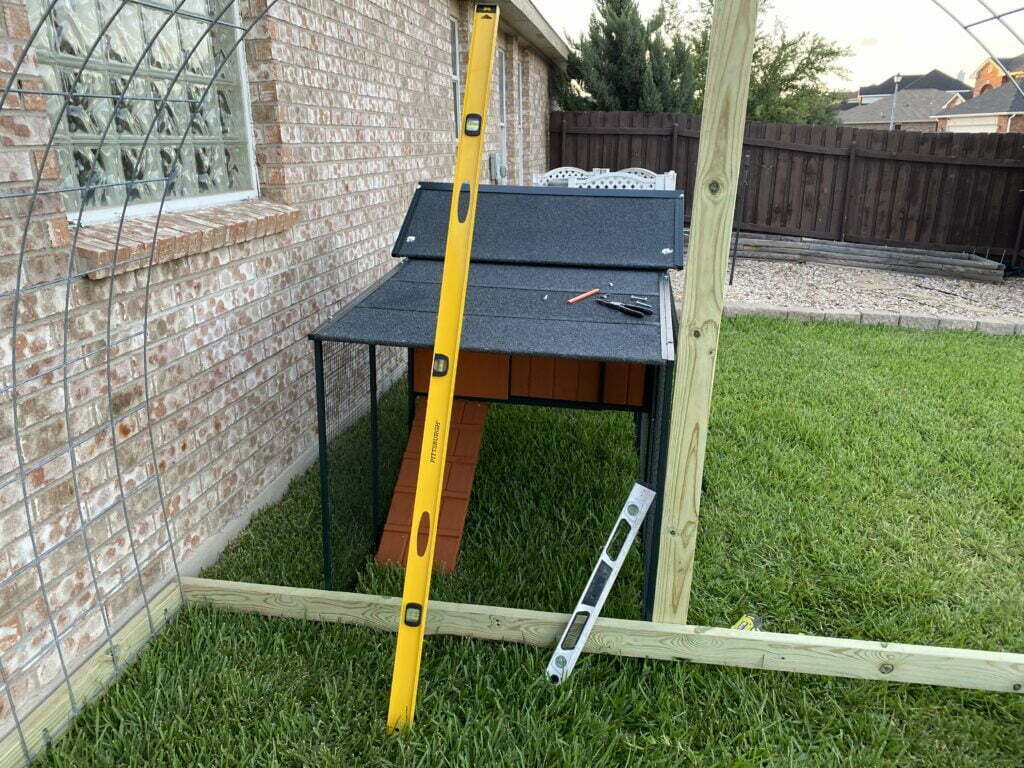
Step 4: Build Chicken Coop Access (if applicable)
For us, we placed the chicken coop on the other side and built a frame around it. Some choose to just put their chicken coop in the yard. It really just depends on your situation and what you prefer.
If you decide not to do this, you can build a similar frame or just place two boards that run parallel so you have something to attach the chicken wire or hardware cloth to on the backside. I would also suggest having at least one brace (you would make this brace just the same as you did for the door).

Step 5: Cover in Hardware Cloth
We originally covered the run in chicken wire then realized we wanted extra protection for our girls and went over it with hardware cloth. If you decide to use hardware cloth, skip the chicken wire.
Use the 4ft wide hardware cloth to go over the top (it will overlap slightly). Secure to the feedlot panels with zip ties and to the board frame with heavy-duty staples or screws and washers. You will want to leave about 2 feet to create a skirt around the base. This will help stop predators from trying to dig under the yard to get inside.
Use the 24″ wide hardware cloth to cover the front and back areas.
Step 6: Build & Attach Door
We built a simple door using three 1x4x8 boards and attached hardware cloth to it. Once done, attach it to the door frame with door hinges and latch to lock (see picture above for hinge placement).
Step 7: Put on Sun Shade
Attach the shade clips to the sunshade and then attach your sunshade to the top using bungee cords. I left a couple of feet open on each side for airflow. This run sits on the East side of our house, so this configuration works well for us. You may need to adjust it depending on the location of your chicken run. Get more fabric than you think you need. You can always cut it if needed.

Step 8: Customize the Run to Your Flock
From here you can customize the inside of the chicken run however you’d like by adding roosting bars, feeders, waterers, or even toys to keep your chickens entertained.
Chicken Run Video Build
We also took video as we were building the chicken run because we know some of our readers learn better visually (we are also like that).
VIDEO COMING SOON!


